
3D Character case study of
Chibi Jinx
Fully rigged and animated for Insta/Tiktok
Chibi Style Character
This project is a fully rigged, game- and film-ready chibi character inspired by Jinx (Arcane), created end-to-end in Blender. The case study shows a tight stylized pipeline: references → blockout → sculpt → retopo/UVs → high-to-low bakes → texturing/shading → rigging → quick animation tests.
The asset is production-minded with clean deformation topology, tidy UVs, and export-ready files (FBX/GLB). The custom rig supports IK/FK, twist helpers, and simple facial controls for expressive poses. Fan art for educational/showcase use only; not affiliated with Riot or Netflix.
PROJECT PIPELINE

Concept
Concept

Modelling
Modelling

Retopology
Retopology

UVs & Texturing
UVs & Texturing

Rig & Animation
Rig & Animation
STEP 1
Choosing the concept
For the concept, I started by collecting the references. All the references were collected in pureref. This is of great help when we start modelling, I have collected references for the eyes, hands and everything. Having great references help in saving a lot of time.
STEP 1
Choosing the concept
For the concept, I started by collecting the references. All the references were collected in pureref. This is of great help when we start modelling, I have collected references for the eyes, hands and everything. Having great references help in saving a lot of time.
STEP 2
Sculpting and High-poly modelling
Next we create the high poly structure. He I modelled all the details manually. Using a combination of sculpting tools for organic shapes like face and hands and using modelling techniques for hardsurface and inorganic shapes like belt and shoes. In this we do not worry about the topology of the model, the goal is to make it as visually accurate as possible.
STEP 3
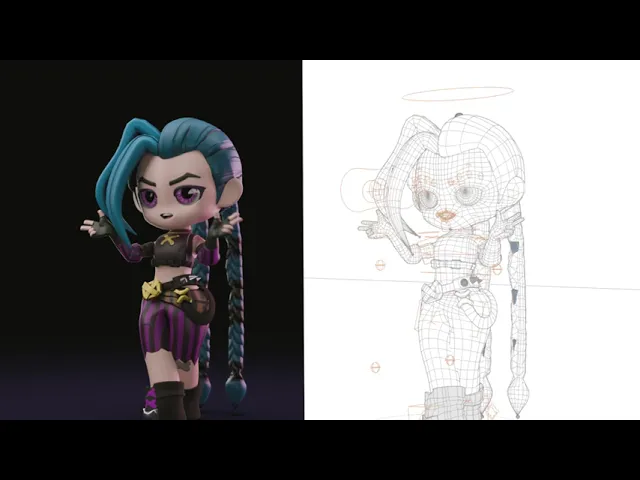
Retopology
In this step I created the optimized version of the high poly model. This is the light version and this can easily be rigged and animated.
STEP 3
Retopology
In this step I created the optimized version of the high poly model. This is the light version and this can easily be rigged and animated.
STEP 4
UV Unwrapping and Baking Textures
Next we UV Unwrap the 3D Model and Bake all the textures from High Poly to Low Poly. The Data is captured in various maps like the Ambient Occlusion Maps, Normal Maps (Tangent and Object) and Manual Textured in the Albedo Maps
STEP 4
UV Unwrapping and Baking Textures
Next we UV Unwrap the 3D Model and Bake all the textures from High Poly to Low Poly. The Data is captured in various maps like the Ambient Occlusion Maps, Normal Maps (Tangent and Object) and Manual Textured in the Albedo Maps
STEP 5
Rigging, Posing and Animation
The step is to add Controls to the Character so that we can pose it and animate it. We can control its Face and Body using this rig.
STEP 5
Rigging, Posing and Animation
The step is to add Controls to the Character so that we can pose it and animate it. We can control its Face and Body using this rig.
Thankyou for the visit!
From what started just as a concept, is now a fully game ready 3D Character.
Creation a character like this including the rig, takes about 7-21 days.
You can check out my other 3D Character case studies or discuss a your project with me using the links below.